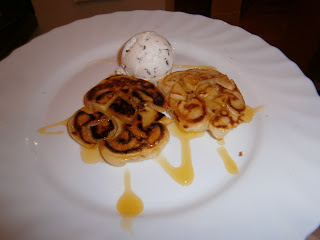
Tuesday, 19 April 2011

Chocolate Krispie Cake Easter Nests

Here's another sporadic exam-time update for you all to prove my blogging dedication!  I'm afraid it's not the most exciting recipe in the world (without mentioning the fact that everyone over the age of three probably knows how to make these) but cooking fun stuff hasn't been my top priority at the moment. However, despite their simplicity, these cakes are Easter themed and very tasty, so you should give them a go!


To make about 20 cakes you will need:
  • 2 large bars of chocolate
  • About 1/4 of a small box of Rice Krispies (or any other plain cereal, cornflakes or bran flakes work too, but I feel that Rice Krispies look the best)
  • Mini Eggs


1. Firstly, break the chocolate into pieces and place into a glass bowl.  You can just about see the top quality chocolate I am using (40p from Tesco...)


2. Bring some water in a pot to a simmer and put the glass bowl into the pot, so that the bottom of the bowl is above the surface of the water.  After going out and buying a glass bowl for this purpose, I realised it was much too small to sit like this on any of my pots, so I melted the chocolate in the microwave instead and it turned out fine.  Put it in for a minute and take out halfway through to stir, when it's done it should be lump-free and of the consistency pictured above.


3. Add the Rice Krispies to the chocolate and stir them in.  The amount you add is up to you, depending on how chocolatey (is that a word?) you want your cakes to be, but all the Rice Krispies should be chocolate coated. 


4. Spoon the lovely chocolatey mixture into paper cases.  Use a teaspoon to scrape the mixture off the wooden spoon for extra speed and accuracy.


5. Add a mini egg to the centre of each cake, and then put in the fridge to set.  Remember to take them out of the fridge about 15 minutes before you want to eat them or else they'll be quite hard.

I hope everybody has a great Easter if you celebrate, I'm planning to do some kind of lamb dish so watch out for that appearing here in the next month or so...  I can't wait for next Thursday when my exams are over and I actually have time to have a life again!

Thursday, 14 April 2011

Jamie Oliver's Chicken Tikka Masala

Here's  another recipe from the lovely Jamie Oliver for you all, this time one that actually worked better than my attempt at fishcakes, mainly because I had all the ingredients this time...  This was my first time making a homemade curry and I was pleasantly surprised at how it turned out - I've had curry sauces from jars before but I feel that it's always nicer to know exactly what goes into your food. 


For the Tikka Masala, you will need:
  • 1 red chilli
  • 2 cloves of garlic
  • 15g ginger (Jamie Oliver specified fresh ginger but I had to resort to dried thanks to my somewhat pathetic local supermarkets)
  • Paprika
  • Garam Masala
  • Cinnamon
  • Turmeric
  • Coriander (fresh if possible, Tesco surprisingly had packets of this)
  • 1 onion
  • 2 peppers
  • Tinned tomatoes
  • Tomato puree
  • 2 chicken breasts
  • 100ml plain yoghurt
  • 100ml double cream
For a student-orientated cooking blog, this is quite a ridiculous list of ingredients, but don't be put off!  I already had all of the vegetables, spices and tomato-based things in the house, apart from the ginger and coriander, so it really wasn't all that expensive a meal. If you don't have anything on the list but are serious about getting into cooking, you could always use this recipe as an excuse to go out and buy a ton of herbs and spices - most of these are useful, everyday things that I use in a lot of my cooking, so think of it as an investment!  Remember supermarket brand spices are a lot cheaper, plus the ones in Tesco have letters on the bottles so you can also use them to spell out cute/obscene words to decorate your kitchen.

1. Firstly, chop the chicken into small pieces and place in a dish or bowl.  I think this is the first time that my blog has featured photos taken in daylight rather than my horrible kitchen lighting, thus marginally improving the quality of my terrible photography.  Hooray!


2. Chop the chilli, garlic and ginger (if you've managed to acquire fresh ginger).  Discard the chilli seeds if you don't like your curry to be too hot.


3. Mix the chopped chilli, garlic and ginger together with the chicken.  Add a generous sprinkle of paprika and garam masala, plus a couple of tablespoons of tomato puree, a drizzle of olive oil or sunflower oil, and some chopped coriander.  Jamie Oliver suggests leaving this to marinate for 24 hours, but as I am far too disorganised for such a proposition, I left mine for about 4 hours and it was still very flavoursome.


4. After leaving the chicken to marinate for as long as your hunger can withstand, begin to prepare the rest of the meal by chopping the onions and peppers.  Sadly I only had green peppers so my curry isn't as dramatically colourful as I would have liked.


5. Fry the onions and peppers in a large pot or wok and add a pinch of cinnamon and turmeric and some more chopped coriander.  At this stage it should hopefully begin to smell really nice.


6. After about 10 minutes when the onions and peppers are soft, add the tin of tomatoes and the yoghurt.  Then add the chicken pieces and simmer gently for 15-20 minutes.  Now would be the time to think about boiling your rice and so on.


7. Just before serving, add the double cream and some more chopped coriander and stir through until the curry is bubbling again.


Here is the finished product!  I served the curry with rice and garlic and coriander naan breads.  If you want to go all out and have an Indian feast, get some poppadoms and chutneys as well, or whatever else you fancy.


I tasted the curry before adding the cream and it was perfectly spicy, but after the cream was put in it was quite mild, so if you like hot curries I would suggest using less cream.  Other than that it was lovely, and the quantites were enough to give Tetley and I a substantial dinner plus lunch the next day - definitely worth the extra effort!

Tuesday, 12 April 2011

Two Sexy Italians

Hey guys!  Sorry again for the long hiatus in blogging, it's been a hectic few weeks for me.  Since I last posted, I have started my new job as a young leader with the Brownies, begun revising for my exams (at the end of this month, boo!) and most importantly, been to see friends and family in Edinburgh and Aberdeen.  In my travels I ate at two amazing Italian restaurants, so I thought I'd big them up in case any of you happen to ever be in these areas!


My first meal was at Inca in the Bruntsfield area of Edinburgh.  I have quite a soft spot for this little restaurant, as I have been going there for years with my sister Mairi, her partner Carrie and (in latter days) Tetley.  It's a family run business and Mr Inca is amazing, he'll always give you good chat.  While the decor is a bit dated (check out the amazing 90s website design for an idea of just how much), the food is delicious and the spaghetti bolognese is the best I've ever tasted - and this is coming from a serious bolognese fan...


Tetley and I both had the bolognese as usual, the presentation is a bit slapdash but it's honestly so tasty!


The pizzas at Inca are also super good, they're not so massive that they have to be served on trays, Pizza Hut style, but I personally prefer that if I'm having a pizza to myself so I don't look like a total fatty.  The pictured pizza is Mairi's olive and anchovy one (not in my top ten of pizza choices...) but they do really nice spicy chicken ones as well, and of course the Pizza Bolognese to further fuel my obsession!


Here is my nephew Leo enjoying his pepperoni pizza :)


The occasion of the meal was to celebrate my Mum and Dad's Ruby Wedding anniversary, they've been together for an impressive 40 years.  It was such a lovely day, and so strange to think that out of the 14 people at the meal, 8 of us wouldn't even be alive if not for those two.  Good work, Mum and Dad!

After Edinburgh, we travelled up to Aberdeen.  Tetley had got us tickets to go and see Hairspray at the theatre for our two-year anniversary (totally unimpressive in the light of my parents' recent milestone!).  Hairspray was amazing, I was grinning like an idiot the entire way through and would highly recommend it if it's showing anywhere near you soon! 

My second meal out of the week was at Zizzi, an Italian restaurant in Aberdeen's huge shiny new shopping centre, Union Square.  According to the internet, Zizzi is a chain of restaurants, but I've never seen one before so it was still a new experience for me.  The restaurant is pretty inside, with a big wood stove oven that you can see the pizzas being cooked in, and rows of painted trees, which turned out not to be too practical after I saw the waiter being hit in the face by branches a good few times...  The food was also good, I went for the Penne Pollo Picante which was a tongue twister to order, but extremely tasty:


I should possibly have taken a picture before the waiter covered it in parmesan... 


While my pasta was nice, the thing that impressed me the most was the garlic bread, it had rosemary and a sort of breadcrumbed effect on the top, it was heavenly!  What made it even better was that we got it for free - a woman bashed into the waiter as he was serving us and two out out the ten or so pieces of garlic bread fell on the floor, so we got the remaining ones on the house, perfect!


The pizzas at Zizzi are quite intimidatingly large, however Suzy managed all of hers despite it being roughly the same size as her torso, so I assume it was good. 

Since being back home, I have cooked a good few things, so expect a return to a regular(ish) posting schedule soon!  Next up is my first attempt at a homemade curry, stay tuned...

Wednesday, 30 March 2011

Pesto-topped Mini Salmon Fillets

Hey guys!  Tetley and I have been feeling a bit under the weather these past few days, so we haven't been cooking anything very exciting.  When I looked back through my mismash of photos for this blog though, I found pictures for this recipe that I forgot to post, which lets me off the hook somewhat...  Although not the most attractive recipe (green is always a dubious colour for food in my opinion), these salmon fillets are very tasty, they converted fish-hater Tetley so even if you're not the biggest fan of fish you should give them a try!


To serve two people, you will need:
  • 2 fillets of salmon
  • 3 tbsps green basil pesto (or any other pesto you have)
  • 2 slices white bread
  • Parmesan or cheddar cheese
  • Parsley

1. Firstly, cut the salmon fillets into inch-thick pieces, placing them skin down on a baking tray.


2. To prepare the topping, firstly make the breadcrumbs by putting the bread in a food processor or toasting then grating it.  Grate the cheese too, the amount is up to you but I generally use a big handful, I probably put cheese in far too many of my meals...


3. Put the cheese and breadcrumbs into a bowl and add the pesto and parsley.  Mix everything together, if it looks too dry then add a bit more pesto.


4. Spoon the mixture on top of the salmon strips, splitting it evenly as you can between them all.  Bake in an oven pre-heated to 180 degrees for about 10 minutes.


I usually eat these with potato wedges or homemade chips, but we were out of potatoes so I cooked some tagliatelle instead, which worked surprisingly well with the crispy-topped salmon and probably made for a healthier dinner.  Why not experiment and see if you can find another way to serve this meal?

Tuesday, 22 March 2011

Fantastic Homemade Burgers

Hello blog fans!  Sorry I haven't been posting as regularly as usual - my friend Bradley has been staying with me this week and we have been very busy having exciting alcohol and shark related adventures.  Hopefully this burger recipe will make it up to you all though, it's tasty and impressive looking but actually really easy to make, perfect for when you have friends over!


To make four burgers, you will need:
  • 4 rolls or burger buns
  • 500g turkey mince
  • 3 slices of bread
  • 1 small onion
  • 2 tbsp Worcestershire sauce (which I did NOT just have to Google to find out how to spell...)
  • Parsley
  • Toppings of your choice
1. First of all you will need to make your breadcrumbs.  If you're lucky enough to own a food processor, put the slices of bread in this, but if you, like me, only have pathetically basic kitchen technology, make the breadcrumbs with a grater.  It's easier to do this if the bread is slightly stale or if you toast it for about 30 seconds first.


2. Next, dice the onion as finely as possible, because no one wants massive chunks of onion inside their burger, unless they are onion rings.


3. Put the onion and breadcrumbs in a large bowl and add the Worcestershire sauce and a big sprinkle of parsley.  Mix everything together.


4. Add the mince and squish everything together with your hands.  This is quite an odd sensation but I quite like it, it reminds me of playing with Play-doh, that is if Play-doh was made from raw meat...


5. Shape the lump of meaty stuff into burgers.  The quantities given do make four burgers, but as there were only three of us I made three really big ones and had to throw a tiny bit of the mixture away.


6. Heat some sunflower oil in a pan and cook the burgers for 15-20 minutes.  Turn them occasionally with a spatula.  While they cook, prepare your toppings - we had grilled bacon, lettuce, cheese and tomato relish, but be as creative as you like.  You could try jalapenos and salsa for a spicy burger, or cook some battered onion rings for a really tall and impressive look.  I also lightly toast the burger buns at this stage.


7. After 15 minutes, check if the burgers are done by cutting into the biggest one with a knife.  If it's at all pink inside it's not ready yet, you'll know when it's ready when the juices that come out when you cut into it are clear.  Don't worry if the burger begins to look quite dark on the top and bottom, mine were and they didn't taste burnt at all.

Here is the finished burger, it is served with my spicy potato wedges, which I added sweet potato wedges to for the first time, they were delicious!  This is the perfect meal if you want to treat yourself without feeling too unhealthy, as turkey mince has a lot less fat than beef mince, plus roasted rather than deep-fried chips are presumably a lot better for you.  If you are a beef burger puritan, follow this recipe but substitute the turkey mince for beef mince (obviously) and add an egg to the mix, as beef doesn't stick together as well as turkey does.

Tuesday, 15 March 2011

Spanish Sausage and Bean Stew

I got the idea for this recipe ages ago from a magazine, but I've changed it so much since then that I now feel like it's mine.  The 'Spanish' aspect of the stew is debateable, but it has chorizo in it so that's good enough!


For the stew you will need:
  • 6 pork sausages
  • 1 chorizo sausage or a pack of chorizo slices
  • 1 large onion
  • 3 cloves of garlic
  • Other vegetables if desired (I used peppers and a courgette)
  • 1 tin of chopped tomatoes
  • Tomato puree
  • 300 ml pork or beef stock
  • 1 can canellini beans (I used kidney beans this time as that's all the conveniently close Tesco has)
  • Paprika and chilli powder
1. First of all, chop up all of the vegetables and set them aside, to save time later.


2. Next, cook the sausages in a large pot or wok for about 10 minutes until they are golden.  While you can buy the cheapest versions of everything else in this recipe, I would advise buying nice sausages as ominously pink, supermarket value ones are gross and don't tend to contain much meat.  These carmelised onion ones are delicious and really not that expensive:


3. Tip the sausages and all of the delicious meaty juices into a bowl and set aside.  Add the vegetables and chorizo to the pot or wok and cook until the veg is golden.

4. While the chorizo and veg cook, cut up the sausages into small chunks with a knife and fork.  Don't worry if they're still slightly pink inside as they're about to be cooked some more.  I added some bacon as well as I needed to use it up, if you do this then cook it with the sausages at the start.


5. Tip the chopped up meat back into the pot or wok and add a lot of tomato puree, the stock and as much paprika and chilli powder as you prefer.  Turn down the heat and leave to simmer for 20 minutes.


6. Add the beans and the tin of tomatoes and cook for a further 5 or 10 minutes.


This stew is perfect served with some crusty bread or garlic bread to mop up all the juices.  The quantities I gave serve about three people, so adjust accordingly depending on how many people you need to feed.  Enjoy!


Thursday, 10 March 2011

Pancake Party

I'm not a Christian, nor do I follow Lent, but every year I still celebrate Pancake Day, as a day you celebrate by eating pancakes seems like a pretty good thing to jump on the Christian holiday bandwagon for.  This year, Tetley and I had a couple of friends round for drinks and a pancake party.  I must confess, I'm actually really bad at making pancakes, so we set up a mini production line with me making the batter and Tetley cooking and flipping the pancakes.  Tetley is surprisingly adept at this, as seen in my incredible action shot below, and not one pancake ended up on the ceiling or floor!  If you would like to hire Tetley for your pancake-related celebrations, please notify me in the comments below, fees are negotiable. :P


We made two different types of pancake for the party, the first being large, thin crepes and the second small, thick, American-style pancakes.  I got the recipes from Good to Know Recipes, a handy site/magazine.

For the crepe-style pancakes you will need:
  • 300ml semi-skimmed milk
  • 2 eggs
  • 125g plain flour
  • 25g butter, plus extra for frying
  • Toppings and fillings of your choice
1. Measure out the milk and then whisk the eggs into it.  Put the flour into a bowl and make a little well in the centre, as pictured:


2. Gradually pour in the milk mixture, whisking constantly until the batter is smooth and runny.  Melt the butter and whisk it in to the batter.


3. Heat some butter in a frying pan.  If your frying pan isn't non-stick, aquire a non-stick frying pan from somewhere or this really won't work, as I know from my pancake-making experiences in first year of uni.  When the pan is quite hot, ladle in about this much batter:


4. Gently push around the edges of the pancake with a spatula to prevent it sticking to the pan.  After about two minutes, flip the pancake, or for more cowardly pancake makers (i.e. me) turn it over with a spatula.  Cook for two minutes on the other side, then you're done!


5. Add your fillings or toppings.  These pancakes are not particularly sweet on their own, so any topping works well - ours varied from Tracy's pancake, which she covered in every chocolate item she could get her hands on, to Ruaridh's Super Manly Bacon Pancake, to Malik's healthy halloumi, hummus and salad option, which is the perfect choice if you, like Malik, put vegetables in all your home baking. 

Sadly I was too busy in my pancake production line to take pictures of these amazing culinary feats, I only have a photo of my unimpressive looking but very tasty pancake, containing some squares of white chocolate with raspberry pieces.  I put it in the microwave for a few seconds to melt the chocolate, it was so so good!


For the American-style pancakes, you will need:
  • 125g self raising flour
  • 1 tsp baking powder (or BACKPULVER if you buy from Lidl, I find this inexplicably funny)
  • 1 egg
  • 125ml semi-skimmed milk
  • butter for cooking the pancakes
1. As before, put the flour and baking powder in a bowl and make a well in the centre.  Add the egg to the well, and gradually beat in the milk to make a smooth batter.

2. I wanted to make apple and cinnamon pancakes, so at this stage I peeled and finely chopped two apples and sprinkled on some caster sugar and cinnamon, then cooked the apple pieces in butter for a few minutes.

3. Heat some butter in a non-stick frying pan, and drop the batter into the pan using a tablespoon.  You should be able to make two or three pancakes at once as they are small.


4. Cook the pancakes for three minutes, then turn with a spatula.  Don't try and flip them because with multiple pancakes cooking at once this will turn into a mess, unless you have crazy pancake skills.

5. The pancakes pictured above are plain as Tetley and Tracy didn't want the apple filling.  If you're doing the filling, however, drop a few apple pieces into the pan and then spoon the batter on top of them, and you'll get pancakes with lovely appley, cinnamony centres.  Here's a picture of the apple pancakes:


Here, the pancakes are served with golden syrup and ice cream.  The recipe suggested toffee sauce instead of syrup, which also sounds delicious.  Hope everyone had a great Pancake Day, if you celebrate!